
LINING THE WALLS OF THE SHELTER
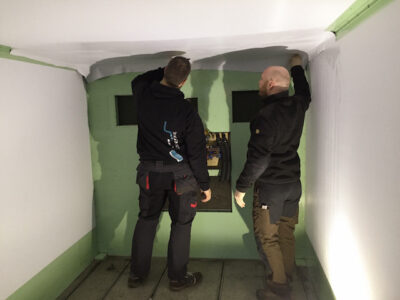
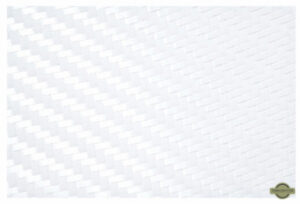
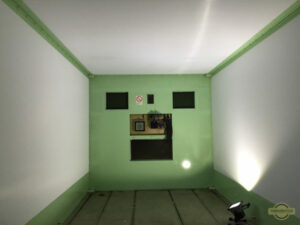
A major milestone has been reached in the “Old army shelter becomes our tiny house”-project. We lined the walls and ceiling with a white textured carbon fiber film, specially made to wrap vehicles. Expensive yes, but it makes a huge difference! White instead of mint green walls, makes the shelter optically bigger. We saw it for the first time in the shelter of Holger from ZEPBOX and knew immediately that we wanted that as well: it provides a modern look, hides the imperfections and is easy to clean (which is a necessity with white walls). We love it. As you can see on the pictures we did not line the walls entirely. Why?
THERMAL INSULATION
The bottom of the walls will eventually be hidden behind the furniture, so no expensive lining there. More important is that the container locks and beams are cold bridges, thus need extra insulation. This is also required for the wall where once a heater was installed (front wall) and the back where the original door was located. These walls are not as well insulated as the sidewalls (60mm thick).
Tip: If you keep the back door of the Zeppelin-shelter, you really need to insulate it as much as possible. We can’t stress this enough. Especially when the door will be next to the bed.
For the thermal insulation we used Jackodur. Jackodur is the brand of extruded polystyrene rigid foam panels. It is very easy to use and are moisture and rot resistant. We mounted them to the walls using Tec7 glue. On the front wall we added 20mm. On the back wall we first filled the holes with 60mm Jackodur and filled the gaps with polyurethane foam (S29 from Reca). This foam dries quickly and provides both sound and thermal insulation. Once the holes were filled, we added an additional 20mm Jackodur to the entire back wall.


White Dibond plates (2.5mm) were then added to cover the Jackodur. Dibond panels are Aluminium Composite sheets, combining two 0.3 mm aluminium surface layers with a polyethylene core. They provide a very clean surface that has a very high resistance to weathering and corrosion.


After over one year of travelling and living in an army shelter full-time my strong recommendation: insulate more!
We are now experiencing damp and mould problems in the corners where the upright frame runs through the walls of the shelter. Even the around the uprights which are 1.1 meter from the corners doe sweat and start to develop black mould spots… Just saying.
Greetings from Chile! Juergen
Thanks Juergen for the advice!
Do you think that even after all the extra insulation we added, we should add more?
We have not noticed any damp issue during the cold days, but when we close off the shelter completely after a very hot humid day, we encounter the to be expected heat damp the next morning. Closing off the shelter then prevent the humidity from escaping (it basically is a sealed box then) and fresh air to circulate.
Hello Elmer and Nicole,
You did a great job with your Steyr! I have just bought an Unimog with a zeppelin shelter. I too want to make windows in it. How did you figure out the position of the frame in the walls an ceiling before cutting the holes?
Thanks Tjaart!
The side beams are visible from the outside in cold weather when the shelter itself is warmer than the outside temperature. This helps a lot; but we only discovered after we already cut the holes. We used the drawings we found on a german forum. We did cut (knowingly) through one of the beams to install the window above the bed (left from our door, next to the steps); from what we could figure out by talking to others and reading online was that this beam was not crucial for the overall stability of the shelter.
Hope this helps.
Love to hear about the progress you make with your build!
Cheers,
Nicole & Elmer
Oké, thanks for the link. I contacted Zeppelin for a drawing. They replied ´no time´, but you can make holes where you like. It won´t affect the strength for what you will do with the shelter.
Are you happy with the Outbound windows? Quite a difference in price with KCT.